
How to Add Photos to a Wix Gallery
- Hannah Stater
- Jan 16
- 2 min read
Editing photos on your Wix site does involve going into the Editor, but DON'T WORRY!
I'll guide you through the best way to add photos to your gallery without having to mess with the design of your site.
Log into Wix and go to your Dashboard. On the left-hand side, hover over "Apps" and click "Manage Apps".
From here, you'll be able to see all apps that are installed and/or available on your Wix site.

Scroll down and find "Wix Pro Gallery", then click "Open in Editor" on the right side. This will automatically find your pro gallery on your website, and take you straight to it.

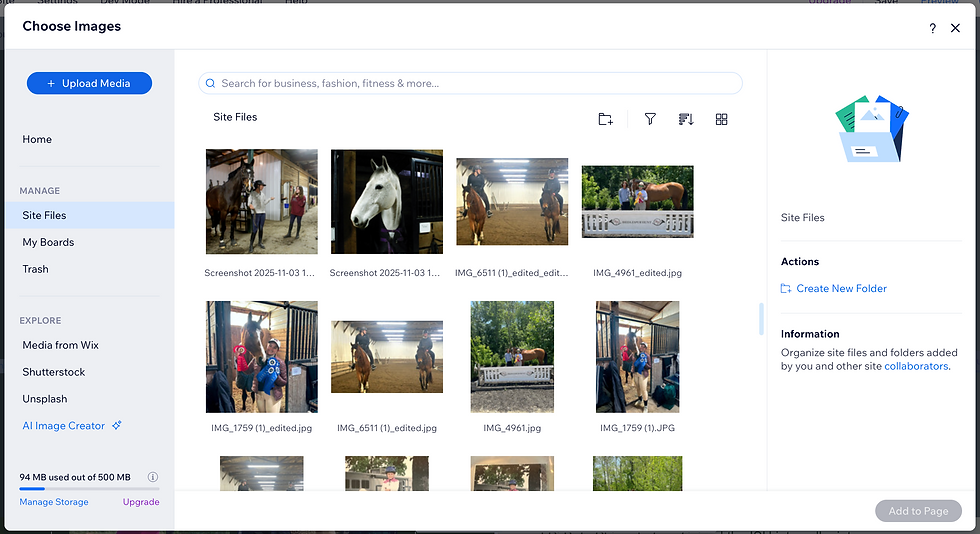
Give the site a minute to fully load, then click "Manage Media". If this popup does not appear, click on your gallery and select "Manage Media" from there.

Click "Add Media" on the top right corner of the popup, then click your media type. For most galleries, this is "Image".

On the screen below, click "Upload Media" on the left side to select images from your computer. Once they've been uploaded to this page, select the photos you'd like to add to your gallery, then click "Add to Page" on the bottom-right.
To change the order in which your images appear on your site, hover over the image until the arrows appear, click and hold on the photo, then pull it side-to-side or up-and-down to reorder the photo. Click "Done" in the bottom-right when you're finished.

To publish the changes to your gallery, click "Publish" on the top-right corner of your screen. Close out of the window to ensure you don't make changes to the design of your site by accident.

Visit your live site to see the changes!


Comments